Saturday, July 2, 2011

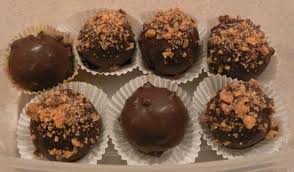
Devil's Sex Cake Bites!


Tonight I started making one of Kyle's favorites--Devil's Sex Cake when I had a fantastic idea! 
OMG!! I could make Devil's Sex Cake Pops or Cake Bites! What fun! Here's how it worked--

Make Basic Cake Pops using devil's food cake and milk chocolate frosting. 
You'll also need this (4-6 bars if you're making a whole cake, or just two if you're making cake pops out of half of the cake, which is what I did)


and this...


I think Mrs. Richardson's might not be available in everyone's area, 
so if you find some, buy more than one (for next time)!

You'll need some CoolWhip if you want to go that route (you'll see what I mean later).


After chilling the dough and making the balls, poke the end of a wooden spoon into each cake pop, 
making space for the best part (coming up in a minute).  I want to point out that after I made the holes,

I realized this would stick less and might work better:


(It did.) Recognize it? It's a nutcracker! (Necessity is the mother of invention, you know.)

Okay, back to the yum!  Warm up the Mrs.Richardson's and put it in a pastry bottle (or whatever it's called--I got it at a cake supply store a while back). BE CAREFUL!  I heated mine in the bottle (not the most efficient method, but it is what it is), and when I took it out of the microwave, it SQUIRTED sauce all over the cupboard and burned my hand a little (after only 15 seconds!)

Anyway, squirt a little deliciousness into each cake bite....


And then patch each one with a little more dough.
You can then just gently roll them again to regain their round shapes. Chill again.


Crush the Heath bars and set aside.


 When the cake balls/bites are chilled again, dip them in melted candy coating
and sprinkle with the Heath candy before they cool/dry. 
I did some like that, and I then tried just stirring the Heath bits into the melted coating
and dipping the cake balls into that. It worked "okay," but not great.

And I also did some like this!


They're beautiful like this, but they have to be eaten right away, and believe me, they were--
I wish I had a video of Kyle's face when he at the first one--That does a mom's heart good :)

So, I made them three different ways, and to tell you the truth, all were delicious!


Yum!


Thursday, June 30, 2011

Peanut Butter Cake Pops

See these little babies?


You may think them cute, but actually, they are quite ugly (the process, anyway). 
While in California, I bought  this cake pop at a Farmers Market...


...and once home, quickly set out to replicate it, because it--was--delicious!  
I'm happy to report that mine are wonderfully delicious, as well, but they did not come without folly. Fortunately for you, you'll be able to learn from my mistakes.

Ingredients:
1 yellow cake and the ingredients mentioned on the box (eggs, oil, water)
3/4 container butter cream frosting
peanut-butter-flavored candy coating
creamy peanut butter (or crunchy, if you'd like a lumpy effect)
sucker sticks

(And now my mouth is watering again!)

Bake the cake and make the cake balls as instructed here.  

You with me? Good.  

Next, scrape the frosting off of the Oreos, like so....


(And please don't tell me they sell Oreos without the frosting, because I'm certain they're just not the same; you gotta have that little bit of sweet left on 'em to make 'em just yummy.) 
Get rid of your pent-up aggression by smashing the Oreos inside a Ziplock bag any way you choose, 
and set the crumbs aside.

Next, melt the candy coating. 
As you can see here, the instructions that came with mine said to melt them and add peanut butter.....


so I did,

....but as you will see in a moment, this created a pretty big pain in the butt--A delicious, ugly mess, 
and I'm hoping to figure out a way to correct it, but I can't argue with the finger-lickin' results--
These babies are delicious.

I made cake pops, so I used sticks. It's a matter of preference, of course. 
Dip a stick in candy coating, place it into the ball of cake...


and dip it into the melted coating.


Looks simple enough, right? 
However, you might also notice that the addition of creamy peanut butter
caused the candy coating to be very runny. 
Quickly, I tried the expected method of letting it drip a bit and then "simply" rolling it in the Oreo crumbs, which resulted in this:


Drat! So I tried this-- rolling them around a little...


Ugly, see? And this...


They still looked like wrecks. 
The coating, though it set up well enough eventually, was just really drippy.

Finally, I decided to do this:


I just sprinkled a bed of Oreos down, dipped them, set them on top of the Oreo dust, 
and quickly sprinkled more on their tops. 
By the time I figured it out, I had this motley crew of practice peanut butter cake-pops.


Every single one of them was delicious. 
Well, not that I ate every single one of them,
but I do admit to eating one of each style
(strictly for quality-control purposes, of course).

The next time I make these (and believe me, there will be a next time), I will probably....
*use a little less peanut butter, maybe?
*buy a different brand of candy melts, maybe?

But that's all that I'd change--
I've made yellow cake with butter cream before and found it to be just "okay."
However, with the addition of peanut butter and Oreos?
Divine.

I like to put my cake pops in the freezer. Have you ever tried that? 
You might not want to do that, though,
because who needs cake-pops that are now twice as good,
 and therefore impossible to avoid eating? 

You might gain 10 pounds from eating them,

and then,

it could get really ugly.


Hey, if you get inspired and decide to go to Creative Cake Supplies (in Green Bay, in the little plaza across from McDonald's on Shawano Ave), tell them Mrs4444 sent you, will you?  I'd appreciate it.

Tuesday, June 14, 2011

Summer Grilled Peach and Bratwurst Kebabs


Mmmmmmmmm.


If you're from Wisconsin, you've certainly heard of Johnsonville brats.  In fact, you probably cut your first molar on a Johnsonville brat. They're all I ever buy, so when I happened upon this recipe on Facebook (Bobby Deen  recipe video) I thought, "Awesome--A new twist on the traditional brat!" and decided to try it. [This is NOT a compensated review--I'm just doing it for fun, because we liked it a lot! Oh, and for the record, brat rhymes with "cot," not "cat."]

Ingredients:

Marinade:
1/2 cup peach nectar*
2 tbls. rice wine vinegar
2 tbls. soy sauce
1 tbls. olive or vegetable oil
1 garlic clove, minced

Other Important Stuff:
5 Johnsonville Original bratwursts
2 green peppers
1 large red onion
3 fresh peaches (not too soft)

First, put the skewers into a pan of water to soak (unless you're a fan of grill fires).

Now, Bobby Deen says to whisk the marinade ingredients together in a bowl, but we 4444s just like to mix our marinades in gallon-size Ziplock bags, so that's what I think you should do. Don't forget to add the garlic.

Prepare the vegetables, brats, and peaches. I just got my camera back after having it held hostage for 30 days, so I'm going to show you what this step looks like.  The brats are cut into fifths.


Green peppers are to be chunked. (See that awesome knife?  I highly recommend you get one for the chef in your house. The Wusthof brand is expensive, but my hero (The Pioneer Woman) recommends them, so I bought one for Mr.4444 for Christmas a few years ago, and it was his favorite gift that year.)


Cut the red onion in big chunks, too.


Place them all in the bag with the marinade, and mix it up to distribute it evenly.


(This is why I like using the Ziplock bag--you can just keep flipping the bag over to move the juice around.)

After about ten minutes, I dumped the marinated goodies into a bowl, because I didn't want to have to dig my hand down in the bag to pull out pieces to put the kebabs together.

Prepare your grill. This is where I get lucky--Mr.4444 is the grillmeister in this house. (I know it's easy;  If you're a grillin' kind of gal, Bravo--I'm impressed, but I like to play the feminine, wimpy role in this regard.)

Grill over medium heat for 10-15 minutes, turning and basting frequently with leftover marinade.


When it comes to grilling kebabs, Mr.4444 recommends using two skewers for each one--It keeps the food from spinning around the sticks and allows for more even cooking that way. (I'll keep that in mind for next time.)

In case there is any doubt, these kebabs were delicious. You Southerners out there might have grilled peaches all the time, but we were grilled-peach virgins before tonight. Wow! They're really, really good!


I dedicate this post to Mr.4444, who burned his fingers repeatedly during the grilling of these fine brats, due to having to spin the skewers and flip individual brat pieces that didn't cooperate. What a guy--I love that man.

*I used apricot nectar, because it's the closest thing I could find, and although I only needed a half-cup, it came in a little six-pack. I figure I'll use the rest of it in other marinades.

P.S. Mr.4444 ate his brat bites with a little ketchup on the side. I ate mine without. We were both very happy.

To see the recipe without all the commentary, click here (but make sure the ingredients are listed correctly--I notified Johnsonville of the mistake, but I'm not sure when they'll get a chance to fix it). It should say 1/2 cup (not 1/4 cup) peach nectar, and the oil is missing from the ingredients list. (I watched the video to get the ingredients straight.)

Wednesday, June 1, 2011

Spinach Ravioli Bake

When I saw this recipe from Mrs.Tuna, I was especially attracted to these words: spinach, mushroom, easiest recipe ever. Turns out she wasn't kidding about the easy part; it's super easy! She only forgot to mention one thing; it's delicious!!

15 oz. package frozen cheese ravioli (or your own homemade, if you are Susie Homemaker)
6 oz package fresh baby spinach
1 24-oz jar spaghetti sauce (or your own...)
1 cup mozzarella cheese 

Optional, mushrooms, but really--who doesn't like mushrooms? (Never mind.), sauteed in butter and crushed garlic. If you're aiming for hardened arteries, don't drain the butter off.

This recipe is SO easy. Mrs. Tuna said you only need one pan, but I used two--Mix everything together in a nice, big bowl, and then plop it into a 2-quart, casserole dish sprayed with non-stick cooking spray. (Someone should think of a quicker way to say that, like "a SWNSCS casserole dish" or "a slicked-up casserole dish" or something like that (I'll keep working on it).

Bake at 400 for 30 minutes (covered). Uncover, add mozzarella, and bake 15 more minutes. YUM

Friday, May 13, 2011

Cake Pop Kids

I first got into the cake pop thing after landing on Bakerella's blog and buying her book for Kendall. Kendall was too busy with school--classes, prom, final exams, getting her driver's license, etc. to barely open it, but I figured it could be a fun little hobby for her.  She loved the cake pops I made, and when she finally wrapped up her A.P.European History exam, she decided it was time to play!  She made her first batch on Wednesday, and they were so wildly received at school that she and her friend, Kelsey, excitedly made some more, this time for A.P. classmates.


That little bottle in her hand is worth its weight in gold, btw!


A little messy (she's learning). 
I suggested she decorate before putting them in the cute little paper cups,
 but what do I know?! :)


You know you've been making cake pops when...


Cake pops, cake balls, goof balls...It's all good!

Thursday, May 5, 2011

Baby Shower Cake Pops

In case you haven't noticed, I've got a new hobby--making cake pops. 
Inspired by Bakerella's book, Cake Pops, I've been having a lot of fun! 
Recently, I googled "Baby Shower Cake Pops" and found a super-cute baby cake pop photo 
(which I can no longer find, of course). 
My colleague, Tina, is about to "pop," so what better treat to bring to her baby shower 
at school tomorrow!  I had so much fun making these!


I used Bakerella's Basic Cake Pops recipe and used the following ingredients to finish my them off:

Dark Chocolate Cake
Milk Chocolate Frosting
Wilton white/vanilla candy melts
Dark Chocolate Candy Coating purchased at my local cake decorating store
a black "candy marker"
cupcake liners
tiny fabric ribbon
a Styrofoam base on which to display the cake pops
cotton candy for the "bed" of my display

Obviously, I went with white candy melts for some of these. I have to admit; they're not my favorite, 
but I didn't know where to find "white" chocolate on short notice. 
I also used dark chocolate candy coating, because that's my favorite, 
and I love the results...soooo cute! 
(It's hard to see in the photos, but they are adorable in normal lighting.

Sadly, I had one "crack baby."


And this one is the first one I made (and my favorite)...


It was a messy job at times, but the process was fun and not hard at all (just lots of steps).


How could it not be fun, with these little cuties staring at you all night?


For what it's worth, they are easy to make; it's just time-consuming. You can easily make the dough and roll the pops ahead of time.  You can also keep them in the fridge (air-tight container or foil covered) for days;
I've eaten week-old pops that are still fantastic.

So, don't you wish you were pregnant?
(Me neither.)
But I'm pretty sure Tina's gonna be glad she is!

Note: Making these took me five hours (I told you it's a hobby!) If I make them again, it will probably go a little quicker.  If I were to sell these cake pops, I wouldn't make them for less than $100, considering the labor and materials. (That's about $2.40 each.) So, yeah; it's not something I'd do every day, but I'm really glad I made them, because I know they'll be a hit tomorrow at the shower!

Sunday, May 1, 2011

Sweet 16th Cupcake Wars Birthday Bash!

This post is simply some videos from the "Cupcake Wars" birthday party we threw for my daughter's birthday. It's for us, certainly, to refer back to when reminiscing, but also for anyone looking for fun ideas for such a party.

First, the surprise (Kendall knew she was having a party but had no idea what kind):


Then, the intro....


After baking, the girls presented the inspiration for their cupcakes...


And a little bit of the judging....Our "Simon," Mr.4444!


We also enjoyed pizza (that we baked while the cupcakes were being decorated)!
In fact, after two hours, I had to ask the girls to wrap up the baking/decorating, 
because we still had to eat and do the presentations.
As it was, the party lasted four fun hours!


The only thing I forgot to do was put all of the cupcakes together and put candles in them for a "cake."
I did that later, at home, and it was okay, but everyone was sick of cupcakes by then, of course.

All in all, the party was a huge success and one no one will soon forget.  
I highly recommend having a "Cupcake Wars" birthday party! :)